T30 Superior Engineering 50mm Strut Spacer Lift Kit.
The pro's and con's (are there any?) of this option over spring lift has been discussed at length already in the forum. This is a D.I.Y. Installation procedure to complement the instructions supplied by the
manufacturers of the spacers.
While this has been undertaken by Dave (Robbo0001) by himself, it is highly recommended to have two people undertake this procedure, as Kev & I really struggled with realigning the bottom of the rear strut to the hub. Theoretically it would also be quicker with two people as there's extra hands to tighten nuts etc...
Others have used slightly different technique which may be easier: Alex disconnected the rear sway bar, which probably made the re-inserting of the rear strut alot easier than when we did it leaving it connected.
Other's descriptions of their installation process can be seen here:
Sandpit (Steve) in September 2005
Alex70 (Alex) in March 2008
Nick Knack (Nick, from Canada) in January 2009
Robbo0001 (Dave) in April 2009
The kit comes with two pairs of spacers with 12 nylock nuts, a 2-page basic instruction sheet, plus a bonus sticker.
Additional parts required:
Small Bottle of 243 Locktite
Gasket sheet
Tools required:
2x wheel chocks
19mm socket/spanner and breaker bar (hollow pipe to fit over handle of socket to crack the lower strut nuts)
offset 14mm spanner to undo the rear nuts on top of the front struts
shifter and/or socket/spanner set (14mm, 17mm)
scissors, stanley knife or sharp knife, (optional hole punch) for making new gaskets
flat screwdriver and hammer to remove/replace brake line clip from strut
trolley jack as well as factory X-Trail jack, handle etc.
4x2inch block of timber for under the factory jack to replace wheels after fitting spacers :)
Spring compressor clamps
Optional: car-stands for peace-of-mind to keep the car more stable while the front is elevated.
Here we go...
Prep:
Check markings on spacers, and using a permanent marker or similar, copy the marking from the top of the spacer to the side of the spacer which will be facing OUT, to make it easier come time to install them.
Allow minimum 6 hours to complete task.
Fronts:
1. Chock rear wheels, crack front wheel nuts, jack up whole front of car using trolley jack placed under cross-member and remove BOTH front wheels.
1a. (Optional) Secure front sides of vehicle from movement using car-stands.
2. Crack the two 19mm lower strut nuts using socket and breaker-bar. After a few turns, you'll need to use the shifter or smaller size spanner to stop the bolt head from spinning. Leave the bolts in place for now. Detach all brake lines (rubber grommets slide out of brackets attached to side of
strut) and other wiring from the strut tower in the wheel arch. Don't forget the one with the clip, which you'll need to use a flat screwdriver and hammer.
3. Crack front strut top nuts taking care not to destroy the rear nut in the process (if you do, you may need to partially remove the plastic covering at the base of the windscreen to allow more access to get multi-grips around the nut). The nuts need to be re-used, so even if you damage one, don't panic as you can put it back on the same way you got it off, like I did :) Someone lifting the strut from below will help ease the tension while removing the last of the top nuts to make it easier to remove.
4. While supporting the weight of the strut, pull out the two lower strut bolts. Some wiggling of the strut may be required. Take care to avoid damage to the brake lines and CV boot. Guide the strut between the driveshaft and the brake line (ie: on the front side of the driveshaft) until the top of the strut clears the tower, then guide the top outwards and remove the strut from the car. Some downwards force on the hub
assembly may be required. It is a good idea to mark the top plate of the strut in relation to the bottom bracket as the top can be rotated separately from the bottom part of the strut (unlike the rears which are fixed in place), so take care not to rotate the top and bottom out of alignment so much that
it would make it difficult to realign the top studs with the holes in the tower.
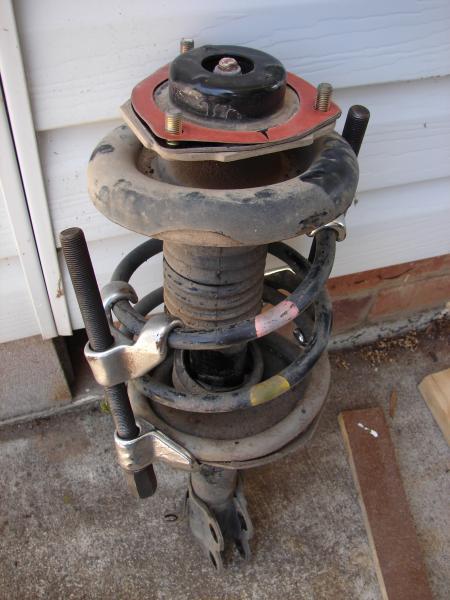
5. Carefully remove the factory gasket from the top of the strut, and trace and make up 4 new ones. You can re-use the existing ones, or you can make up 4 new ones (total of 8), but as the kit doesn't come with gaskets, new ones are needed for the top of the spacers. The new ones do not need the
hole in the middle so are quite easy to make up. We used a stanley or other sharp knife to cut out the notches for the studs as we didn't have a hole-punch.
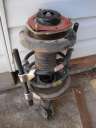 (front strut removed, showing factory gasket)
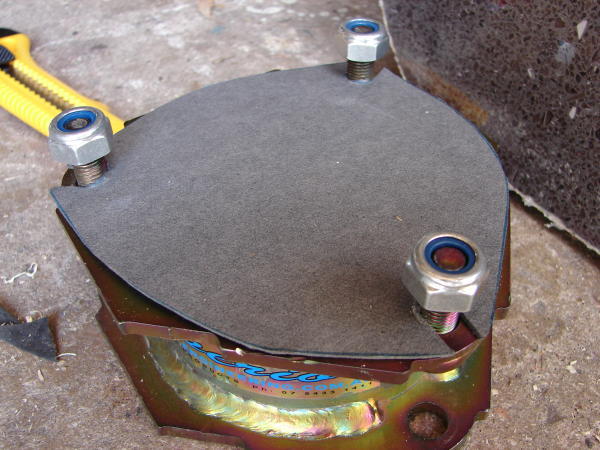
 (new gasket detail)
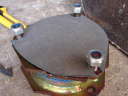
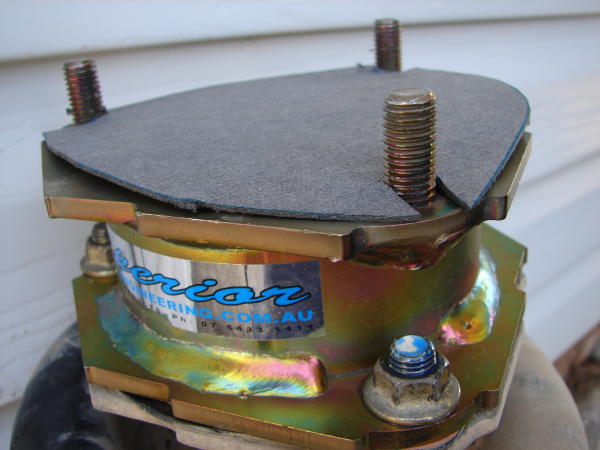
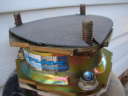 (spacer fixed to top of strut using factory nuts locktited)
6. Clean off top of strut with brush or rag to remove dirt etc, and re-fit factory gasket. Place correct spacer onto strut, correctly aligned (they only go on one way anyway), then apply locktite to the factory nuts and strut studs and tighten. Place new gasket on top of spacer.
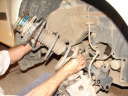
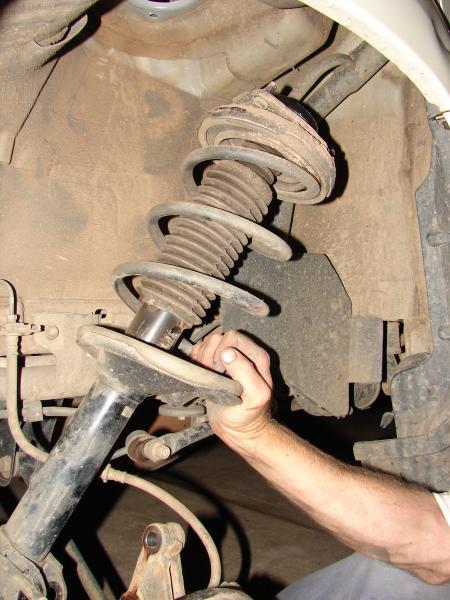
7. Place strut back into wheel arch following reverse of removal step above. Once one stud is through the top of the tower, a new nylock nut can be done up finger-tight to support the weight of the strut while you make several attempts at re-aligning the two holes on the bottom of the strut. For the front strut, the top of the two bottom bolts needs to go in first! (When we did Kev's we did the front struts by jacking the side of the car we were doing first, which put too much tension on the sway bar and thus made it impossible to get the strut to realign with the hub assembly until we jacked up the centre of the car from the front using the trolley jack). A good idea which we really needed for the rears, was to use the flat
screwdriver to help align the holes once it's big enough to fit it in. To get the lower bolt in, you need to push the top of the hub assembly in towards the strut as shown in the photo below to get the holes to align.
 (driver's front)
 (driver's front)
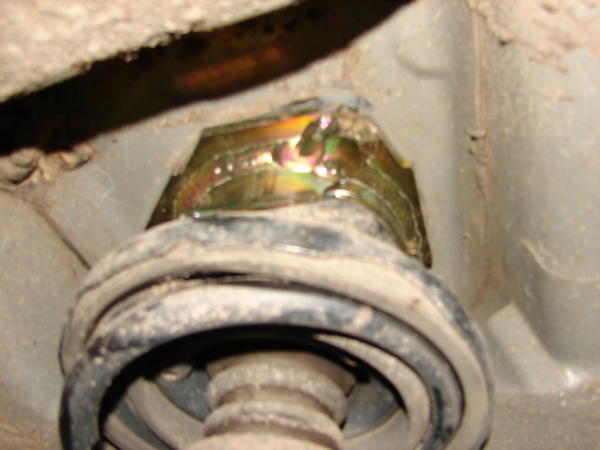
 (spacer studs aligned with holes in strut tower)
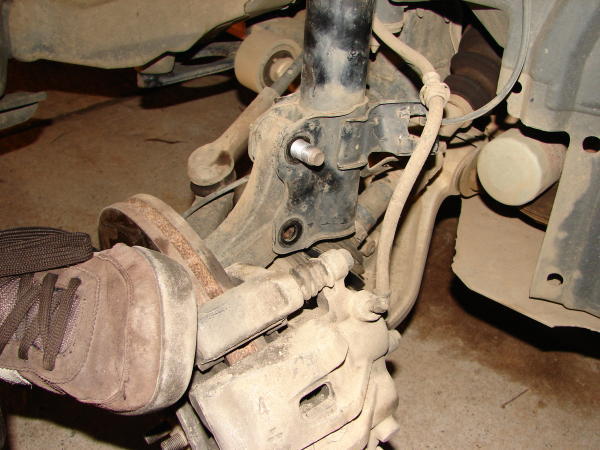
8. Once the bottom bolt is in, apply locktite to the 19mm nuts & bolts and tighten, then re-attach all brake lines and clip. Leave the top nylock nuts finger-tight for now.
 (driver's front)
 (driver's front)
9. The other side is the same as the first.
10. Once both fronts are done, use the 4x2 block of timber under the factory jack to lift one side to replace the wheel (leaving trolley jack in centre of car), then do the same for the other side. Lower the trolley jack and tighten all the nylock nuts on the strut towers in the engine bay. (Offset spanner not required as the top of the strut no longer protrudes through into engine bay). Remove rear chocks and drive the car back and forth a few times to settle the suspension.
Rears:
1. Chock the front wheels, crack all rear wheel nuts, jack up ONLY ONE SIDE using 4x2 timber block under the factory jack and remove that wheel.
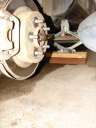 (don't forget the timber blocks so you can re-fit the wheels!)
2. Crack the two 19mm lower strut nuts using socket and breaker-bar. After a few turns, you'll need to use the shifter or smaller size spanner to stop the bolt head from spinning. Leave the bolts in place for now. Detach the brake line from the strut tower in the wheel arch.
3. Remove the trim cover from the top of the strut tower in the boot using flat screwdriver in the slot, and crack strut top nuts. Someone lifting the strut from below will help ease the tension while removing the last of the top nuts to make it easier to remove.
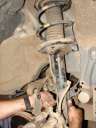
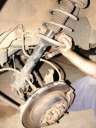
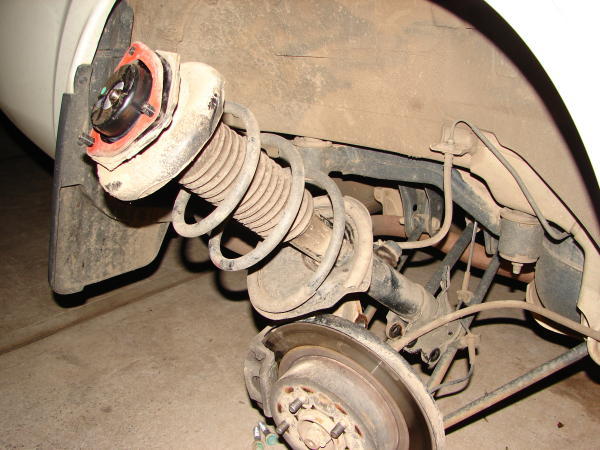
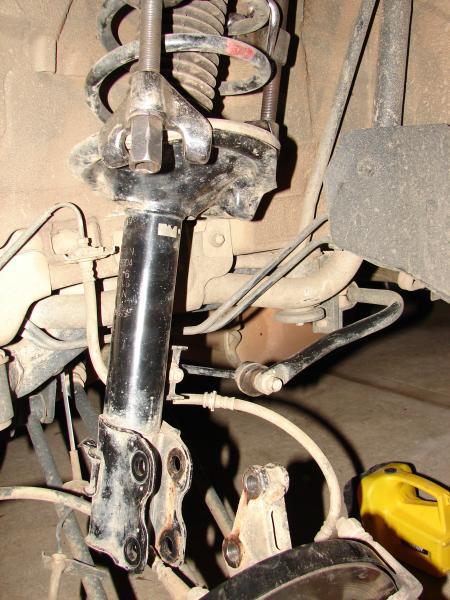
4. While supporting the weight of the strut, pull out the two lower strut bolts. Some wiggling of the strut may be required. Warning: due to the rear sway bar, there will be considerably tension forcing the narrow rod to want to change from almost-vertical to horizontal, so take care to avoid
damage to fingers, brake line and CV boot. Guide the strut between the driveshaft and the hand-brake line (ie: on the front side of the driveshaft), taking care not to damage the hand-brake line (mine got heaps of cuts in it as the bottom of the strut has sharp edges). Once the strut is resting on the control arm (as shown in photo) it is simply a matter of tilting the top of the strut out of the wheel arch - no need to take the strut right out from the wheel arch like was done with the front ones (plus it's still attached to the small rod of the sway bar).
 (passenger's rear)
 (passenger's rear)
 (driver's rear)
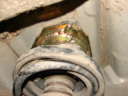
5. On top of the rear strut is a rubber seal to prevent water entry into the boot area. Kev decided to leave them in place before putting the spacer on top, but I decided because the inside of the spacer is sealed anyway, I decided to leave mine out. If needed, I may re-fit it to the top of the spacer as an additional seal to the new gasket we already put on top of the spacer. Only time will tell if they will be needed. Clean off top of strut with brush or rag to remove dirt etc, and re-fit factory gasket. Place correct spacer onto strut, correctly aligned (they only go on one way anyway), then apply locktite to the factory nuts and strut studs and tighten. Place new gasket on top of spacer.
 (rear strut rubber seal)
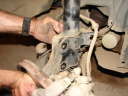
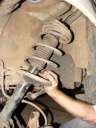
6. To get the top of the rear strut to align with the strut tower holes, was abit difficult due to the tension of the sway bar. You may need to place downwards pressure on the thick part of the sway bar using the breaker-bar levering on the underside of the chassis (see photo) and at the same time (second person) to push the bottom of the strut towards the rear of the car to get the small rod near vertical, then guide the top studs through one of the holes in the top of the strut tower. The breaker-bar operator can then
finger-tighten one of the nylock nuts on the top in the boot. Trying to get the other two studs to align with the holes is even more difficult.
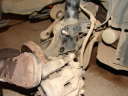
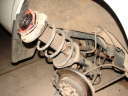
7. The most difficult part for us was to then realign the two bottom strut holes with the hub assembly. We found the easiest method was to use spring compressors to reduce the overall height of the spring by about an inch (or as much as possible), then using the breaker-bar as previously described,
and alot of effort, align the holes. An alternative used by other members (eg: Alex) was to disconnect the rear sway bay, which would avoid the need to use spring compressors. For the rear struts, it was easier to get the bottom bolt in first, then push the bottom of the strut in towards the fuel tank and pushing inwards on the top of the hub assembly, to align the top of the two lower bolt holes. Use the screwdriver to help align the holes once they are lined up close enough to fit the screwdriver in the two
holes. With Kev's, we tried lifting the centre of the rear of the car like we did with the front, to minimise tension on the sway bar (which worked) but then spent an hour trying to get the back wheels on (as we couldn't get the necessary 11 inches needed from the ground to the bottom wheel stud to get the wheels back on, and hadn't put the trolley jack on any timber to give it more height that was needed).
 (passenger's rear)
 (passenger's rear)
8. Once both lower bolts are in, apply locktite to the 19mm nuts & bolts and tighten, then re-attach brake line. Leave the top nylock nuts finger-tight for now.
9. Replace wheel, then repeat procedure on other side.
10. Tighten all nylock nuts on top of strut towers, Remove chocks from front wheels and drive the car back and forth a few times to settle the suspension.
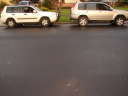 (before and after (warning - full size image is approx 2.1MB for clarity)
Enjoy a refreshing Lift (actually we went through a fair bit of Coke, with it being 39 degrees, then getting poured on when the southerly came through!).
The spacers were fitted on 12 Nov 2009.
 (new gasket detail)
 (spacer fixed to top of strut using factory nuts locktited)
 (driver's front)
 (driver's front)
 (spacer studs aligned with holes in strut tower)
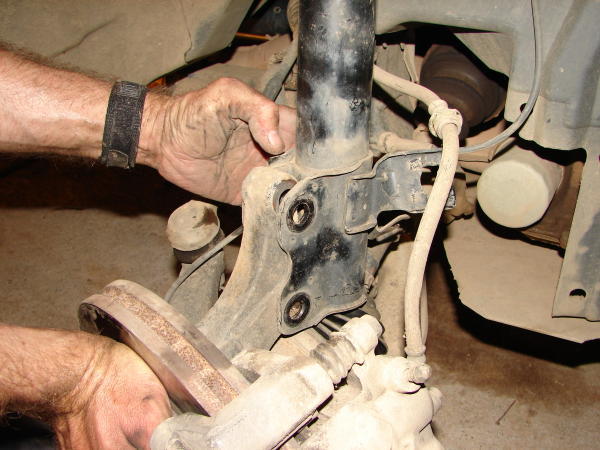 (driver's front)
 (driver's front)
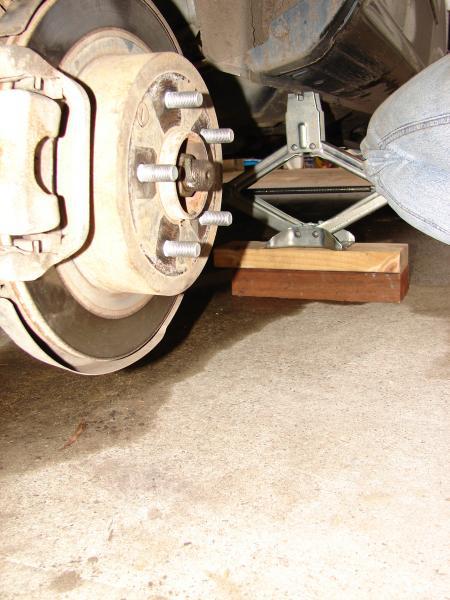 (don't forget the timber blocks so you can re-fit the wheels!)
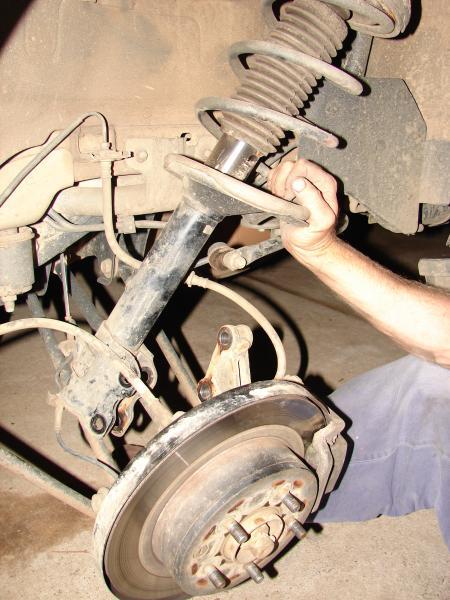 (passenger's rear)
 (passenger's rear)
 (driver's rear)
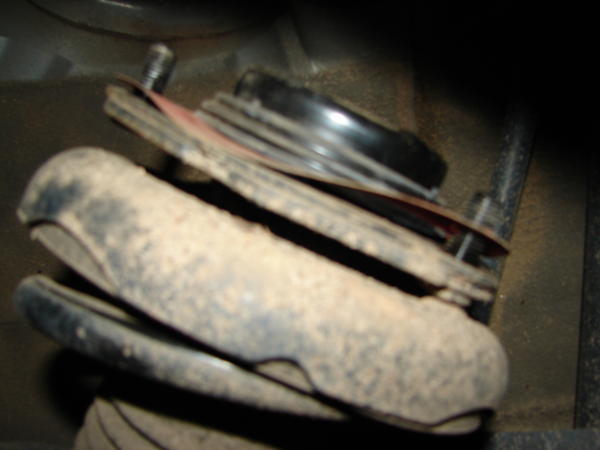 (rear strut rubber seal)
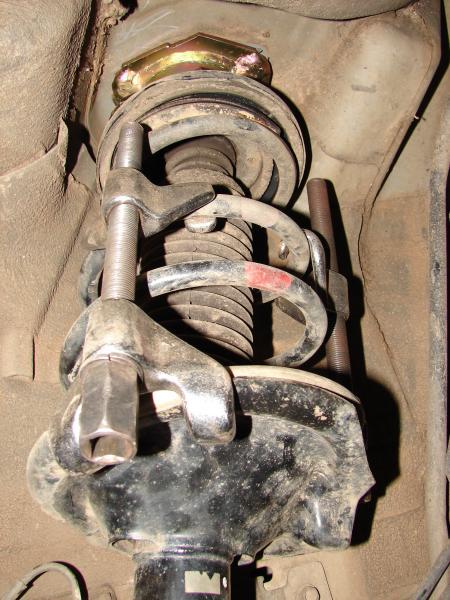 (passenger's rear)
 (passenger's rear)
 (before and after (warning - full size image is approx 2.1MB for clarity)